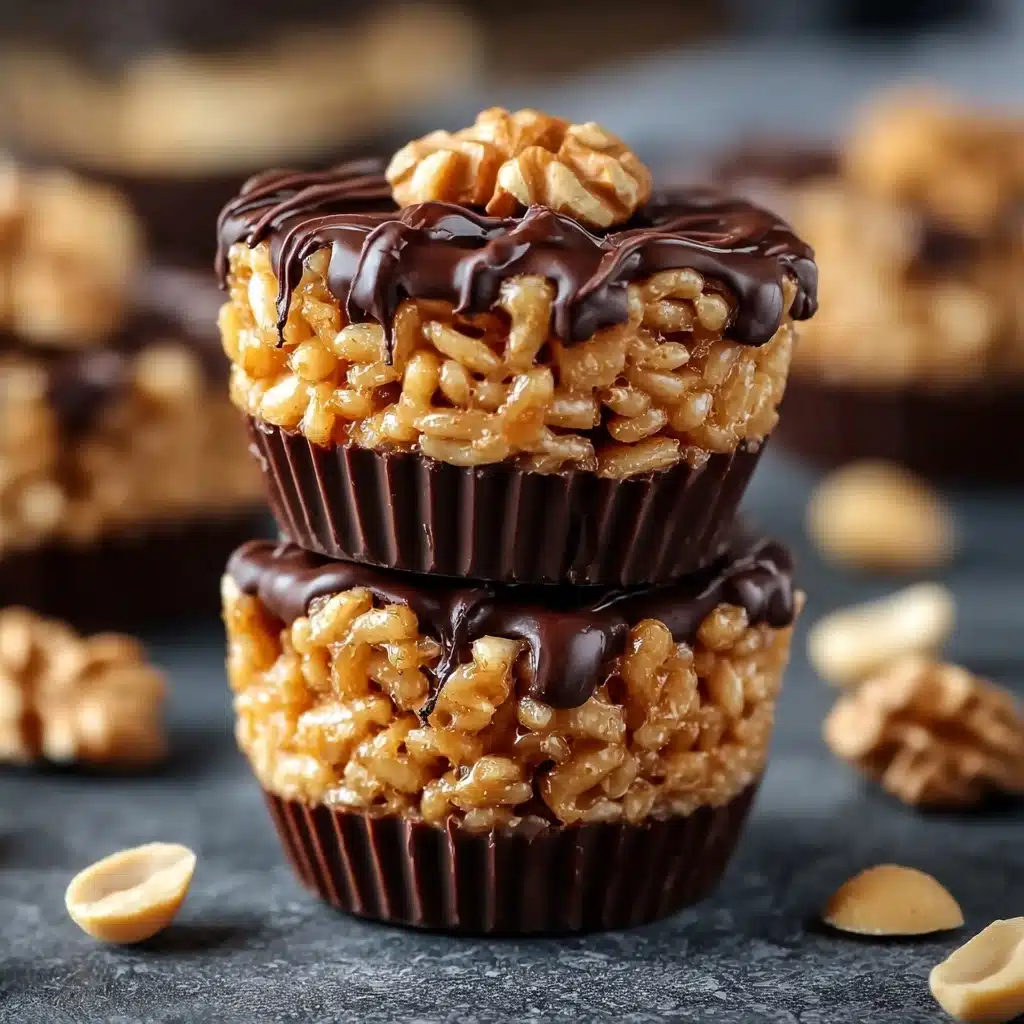
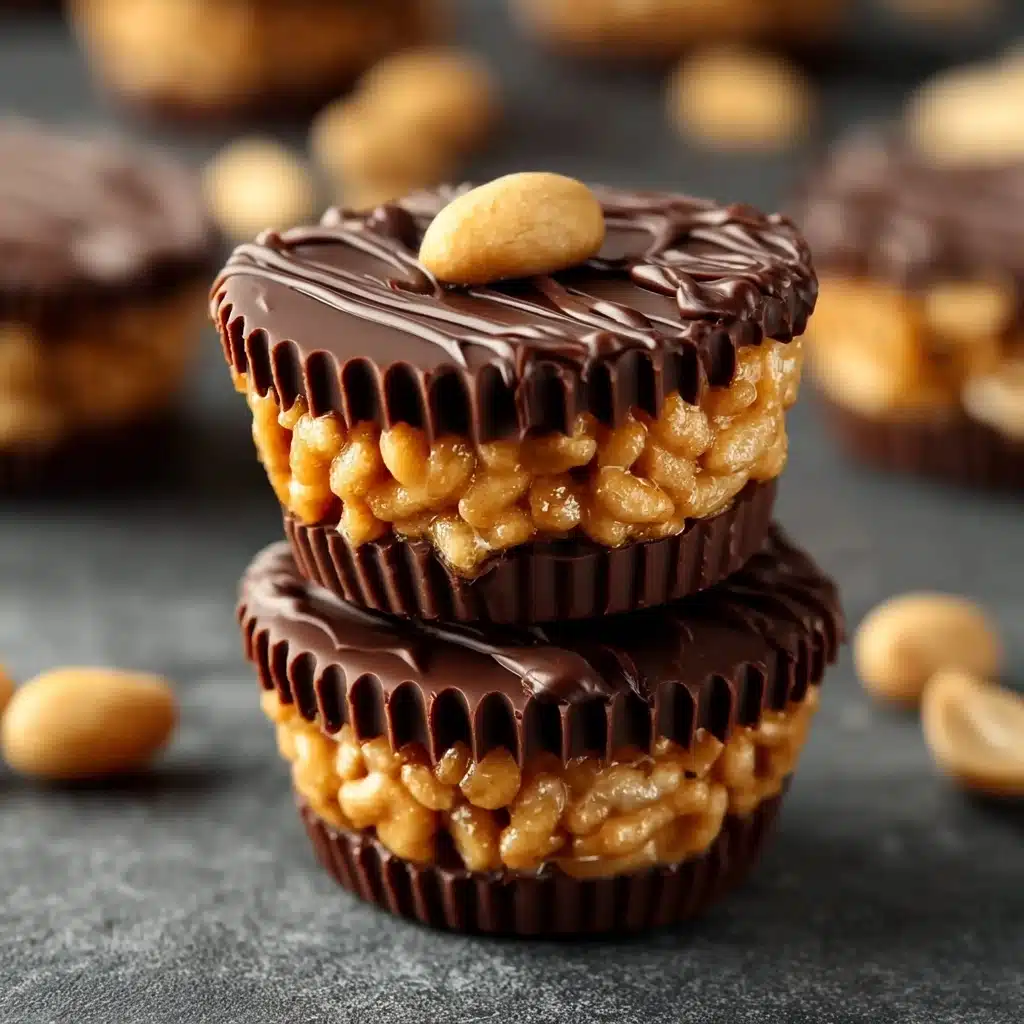
Chocolate Peanut Butter Rice Krispie Cups Recipe
If you love the classic childhood nostalgia of Rice Krispie treats but crave a richer, more indulgent flavor combo, then these Chocolate Peanut Butter Rice Krispie Cups are going to be your new favorite snack. Combining the crispy, airy crunch of Rice Krispies with the creamy warmth of peanut butter and a luscious layer of melted chocolate, this treat offers a perfect balance of sweet and salty with every bite. Whether you’re making them for a party, a quick dessert, or just a special weekday pick-me-up, these cups hit all the right notes and come together in such a fun, fuss-free way.
Ingredients You’ll Need
Getting the perfect bite of Chocolate Peanut Butter Rice Krispie Cups starts with simple, wholesome ingredients that each bring their own magic. From the crisp texture of the cereal to the smooth richness of peanut butter and the gooey sweetness of marshmallows, every element is essential to achieve that melt-in-your-mouth experience.
- 3 cups Rice Krispies cereal: Provides the signature light, crunchy texture that makes this treat so fun to eat.
- 1 cup creamy peanut butter: Adds creamy richness and a nutty depth that perfectly complements the other flavors.
- 1/2 cup unsalted butter: Creates a smooth, buttery base that melts everything together beautifully.
- 1 cup mini marshmallows: Essential for that classic sticky, sweet binding that holds the Rice Krispies in place.
- 1 cup chocolate chips: For the luscious, melty chocolate topping that gives these cups their wow factor.
- 1/2 teaspoon vanilla extract (optional): A subtle flavor enhancer to gently lift the peanut butter notes.
- Pinch of sea salt (optional): Balances the sweetness and intensifies the chocolate and peanut butter flavors.
How to Make Chocolate Peanut Butter Rice Krispie Cups
Step 1: Melt the Base
Start by gently melting the butter and mini marshmallows in a medium saucepan over low heat. Stir consistently so the marshmallows melt evenly and create a smooth, glossy mixture. This sticky base is what will hold everything together, so take your time to get it just right without scorching.
Step 2: Add Peanut Butter
Once the marshmallow mixture is silky and smooth, stir in the creamy peanut butter along with the optional vanilla extract. Keep stirring until the peanut butter is fully blended and the mixture looks velvety and luscious. This is where the rich, nutty flavor really starts to shine through.
Step 3: Mix with Cereal
Pour your measured Rice Krispies cereal into a large bowl. Pour the peanut butter and marshmallow mixture over them and gently fold everything together. Be careful not to crush the cereal — you want each spoonful to have that delightful crisp snap, so just mix until every piece is coated evenly.
Step 4: Shape the Cups
Line a muffin tin with paper liners for easy removal later. Spoon the coated cereal mixture evenly into each cup. Press down gently to create a flat, even surface, but don’t pack it too tight — you want the texture to stay light and airy. This step sets the shape and makes them easy to handle.
Step 5: Add Chocolate Layer
Now for the fun part — the chocolate! Melt your chocolate chips in the microwave in short 20-second bursts, stirring in between so they melt smoothly without burning. Spoon the melted chocolate over the top of each cup and spread it evenly. If you love a little extra punch, sprinkle a small pinch of sea salt atop each one to elevate the flavor.
Step 6: Set & Serve
Let the cups cool at room temperature for about 20 minutes, or pop them in the fridge if you want to speed things up. Once the chocolate is firm, carefully peel off the paper liners and get ready to enjoy your irresistibly delicious Chocolate Peanut Butter Rice Krispie Cups.
How to Serve Chocolate Peanut Butter Rice Krispie Cups
Garnishes
To dress up these cups, consider adding a sprinkle of crushed peanuts or a drizzle of white chocolate on top for a little extra elegance and crunch. Fresh berries on the side can provide a bright, tart contrast that balances out the rich chocolate and peanut butter perfectly.
Side Dishes
These cups shine as a standalone treat, but they also pair wonderfully with a cold glass of milk or a steaming cup of coffee or hot chocolate. For a party platter, try serving alongside some fresh fruit or a light yogurt dip to keep things refreshing and balanced.
Creative Ways to Present
Try serving your Chocolate Peanut Butter Rice Krispie Cups in colorful mini cupcake liners for an extra festive look. You could also stack them to make a layered dessert tower or add edible gold flakes if you’re feeling fancy. They’re perfect for gifting too — just pack them in a pretty box with a ribbon for a homemade treat that anyone would love.
Make Ahead and Storage
Storing Leftovers
Keep any leftover Chocolate Peanut Butter Rice Krispie Cups stored in an airtight container at room temperature for up to 3 days. This helps them stay fresh and maintain their crisp texture without getting soggy.
Freezing
If you want to make these cups ahead of time or save them for later, they freeze beautifully. Place them in a single layer on a baking sheet until firm, then transfer to a freezer-safe container or bag. They will keep well for about 1 month. When ready to eat, just thaw at room temperature for 30 minutes.
Reheating
These treats are best enjoyed cool or at room temperature. If you prefer a slightly melty chocolate topping, pop them in the microwave for 10-15 seconds—but be sure to watch carefully so the chocolate doesn’t overheat or become grainy.
FAQs
Can I use crunchy peanut butter instead of creamy?
Absolutely! Using crunchy peanut butter will add a bit more texture and nutty crunch to your cups, which can be a delightful twist on the classic smooth version.
Do I have to add the vanilla extract and sea salt?
Both are optional but highly recommended. Vanilla adds a subtle sweetness that enhances the peanut butter, while a pinch of sea salt brings out the flavors and balances the sweetness beautifully.
Can I substitute the Rice Krispies with another cereal?
You certainly can. Try using puffed wheat or corn flakes for a different texture, just keep in mind the flavor and crunch might vary slightly compared to the classic Rice Krispies.
What if I don’t have mini marshmallows? Can I use large ones?
Yes, you can use large marshmallows. Just chop them into smaller pieces so they melt evenly and mix smoothly with the butter.
How long do these cups stay fresh?
When stored in an airtight container at room temperature, they will stay fresh for up to 3 days. After that, they may start to lose their crispness but will still taste delicious.
Final Thoughts
If you’re looking for a treat that’s easy to whip up but feels truly special, these Chocolate Peanut Butter Rice Krispie Cups are the perfect choice. They combine familiar flavors in a playful new way that always earns compliments. I can’t wait for you to try making them and experience just how wonderfully simple and satisfying this irresistible dessert can be!
PrintChocolate Peanut Butter Rice Krispie Cups Recipe

Delicious and easy-to-make Chocolate Peanut Butter Rice Krispie Cups, combining the classic crunch of Rice Krispies cereal with creamy peanut butter, melted marshmallows, and a rich chocolate topping. Perfect for a quick treat or snack that everyone will love.
- Prep Time: 10 minutes
- Cook Time: 10 minutes
- Total Time: 20 minutes
- Yield: 12 cups 1x
- Category: Dessert, Snack
- Method: No-bake, stovetop melting
- Cuisine: American
- Diet: Vegetarian
Ingredients
Base Ingredients
- 3 cups Rice Krispies cereal
- 1 cup creamy peanut butter
- 1/2 cup unsalted butter
- 1 cup mini marshmallows
Chocolate Topping
- 1 cup chocolate chips
- 1/2 tsp vanilla extract (optional)
- Pinch of sea salt (optional)
Instructions
- Melt the Base: In a medium saucepan over low heat, melt the unsalted butter along with the mini marshmallows, stirring consistently until the mixture becomes smooth and well combined.
- Add Peanut Butter: Stir in the creamy peanut butter and vanilla extract (if using) until the mixture is fully combined and creamy, ensuring a smooth texture.
- Mix with Cereal: Pour the Rice Krispies cereal into a large bowl and gently fold in the peanut butter mixture until every piece of cereal is evenly coated without breaking it down too much.
- Shape the Cups: Line a muffin tin with paper liners. Spoon the cereal mixture evenly into each cup and press down gently to create a flat, compact surface for better shape and ease of eating.
- Add Chocolate Layer: Melt the chocolate chips in the microwave in 20-second intervals, stirring in between until smooth. Spoon the melted chocolate over each cup and spread evenly. Optionally sprinkle a pinch of sea salt on top to enhance the chocolate flavor.
- Set & Serve: Allow the cups to cool at room temperature for about 20 minutes or place them in the refrigerator for faster setting. Once firm, remove the paper liners and serve immediately for a delightful treat.
Notes
- Use creamy peanut butter for a smoother texture; natural peanut butter may alter consistency.
- For a nut-free version, substitute peanut butter with sunflower seed butter.
- Press the mixture firmly into the muffin liners to ensure the cups hold together well.
- Sprinkling sea salt on top balances the sweetness and enhances flavor.
- Store leftovers in an airtight container at room temperature for up to 3 days or refrigerate for up to a week.
Nutrition
- Serving Size: 1 cup
- Calories: 220
- Sugar: 15g
- Sodium: 85mg
- Fat: 13g
- Saturated Fat: 5g
- Unsaturated Fat: 7g
- Trans Fat: 0g
- Carbohydrates: 22g
- Fiber: 1g
- Protein: 5g
- Cholesterol: 15mg
Keywords: Chocolate Peanut Butter Rice Krispie Cups, no-bake desserts, peanut butter treats, easy kids snacks, chocolate treats