Halloween Mummy Fudge Recipe
If you’re searching for a treat that’s as delightfully spooky as it is indulgently sweet, Halloween Mummy Fudge is your new best friend. This charming recipe wraps creamy white chocolate fudge in playful “bandages” of melted candy, complete with adorable candy eyes that give each piece its own mischievous personality. Whether you’re hosting a Halloween party or just want to surprise the kids with something festive, Halloween Mummy Fudge combines simplicity and creativity in a way that’s utterly irresistible.
Ingredients You’ll Need
Gathering simple, high-quality ingredients makes all the difference when creating this Halloween favorite. Each one plays a vital role in balancing sweetness, texture, and festive flair to make your fudge expertly smooth and beautifully decorated.
- 3 cups white chocolate chips: Provides the luscious, creamy base needed for that melt-in-your-mouth texture; pick dairy-free if you want to keep it vegan-friendly.
- 1 (14 oz) can sweetened condensed milk: Adds the perfect sweetness and smooth consistency while keeping the fudge rich and soft; coconut condensed milk is a great vegan alternative.
- 1 teaspoon vanilla extract: Enhances the overall flavor depth, adding a warm, comforting note.
- Pinch of salt: Balances the sweetness and makes flavors pop.
- 1 cup white candy melts: Used for piping the mummy “bandages” on top; melts easily and holds shape well.
- Candy eyes: These tiny details bring the mummy to life and add an adorable, playful touch; choose gluten-free or vegan options to accommodate dietary needs.
How to Make Halloween Mummy Fudge
Step 1: Prepare Your Pan
Start by lining an 8 by 8-inch baking dish with parchment paper. This crucial step ensures that your fudge won’t stick to the pan and will lift out effortlessly once set — cutting your fudge into perfect squares becomes a breeze.
Step 2: Melt the Base Ingredients
In a saucepan over low heat, gently combine the white chocolate chips, sweetened condensed milk, and a pinch of salt. Stir constantly, because patience here is key. You want everything to melt into one luxuriously smooth mixture without burning. Watch as the grains transform into glossy, creamy goodness that promises melt-in-your-mouth texture.
Step 3: Add Vanilla Then Pour
Once your mixture is velvety and well combined, remove it from the heat and stir in the vanilla extract. This final flavor touch will lift your fudge from ordinary to extraordinary. Pour the mixture into the prepared pan and smooth the surface with a spatula for an even set.
Step 4: Chill Until Firm
Pop the pan into the fridge and let your Halloween Mummy Fudge chill for at least 2 to 3 hours. This waiting game is rewarding because as the fudge sets, it becomes perfectly dense yet soft—ready to be transformed with its mummy makeover.
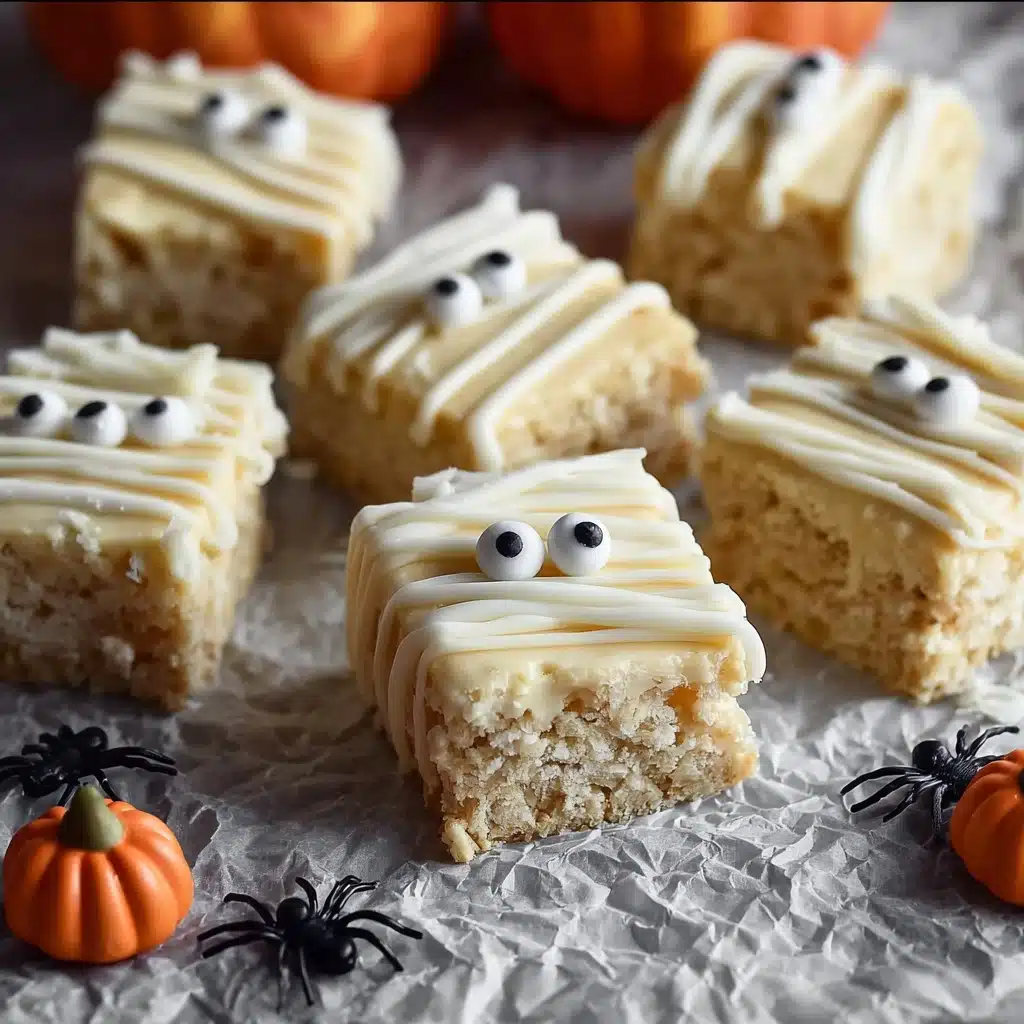
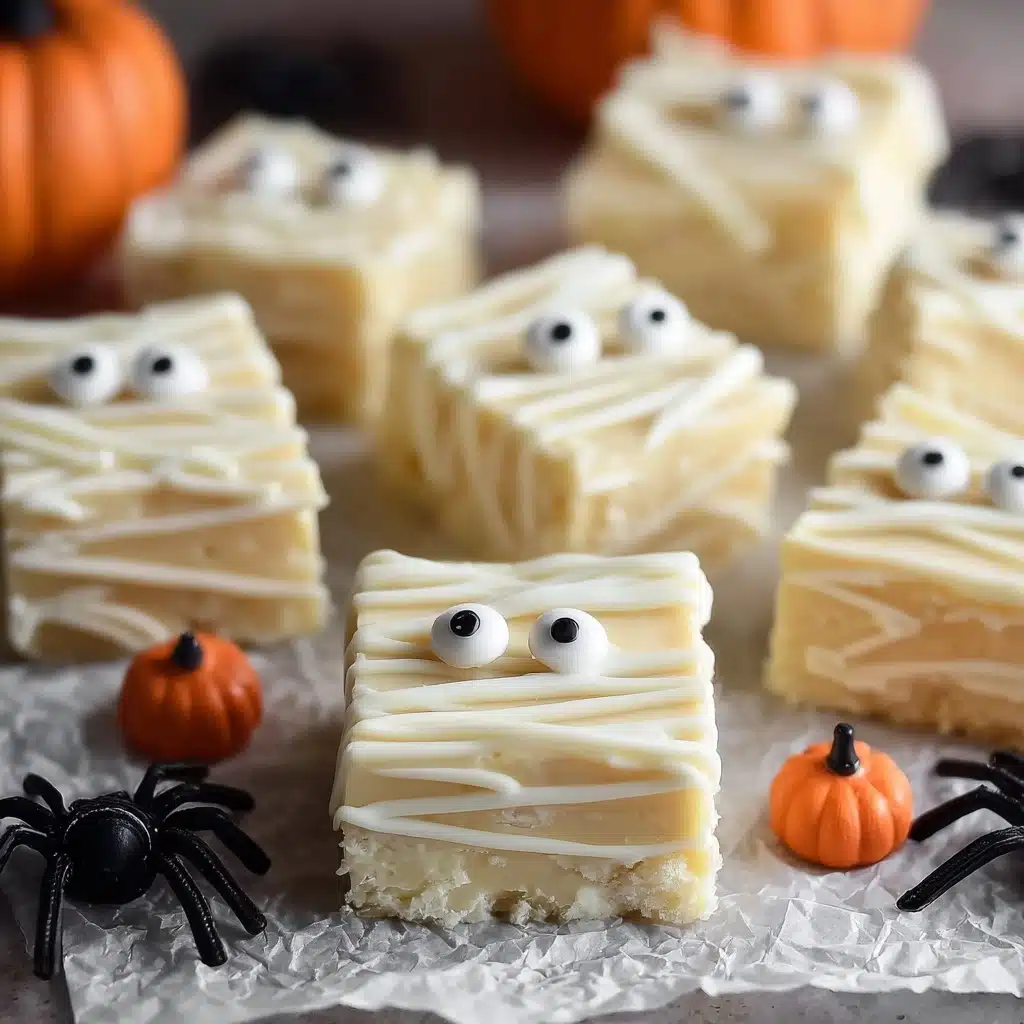
Step 5: Decorate with Mummy “Bandages” and Eyes
After your fudge sets, cut it into squares or rectangles. Melt the white candy melts or additional white chocolate and transfer to a piping bag or a zip-top bag with a tiny corner snipped off. Zigzag “bandages” over each fudge piece in fun, irregular patterns. Finally, press two candy eyes onto each mummy while the melts are still soft so they stick firmly in place.
Step 6: Let Decorations Set
Allow the decorated Halloween Mummy Fudge pieces to rest at room temperature or in the fridge until the candy “bandages” and eyes are fully set. Once firm, your spooky sweet creations are ready to delight every trick-or-treater or party guest.
How to Serve Halloween Mummy Fudge
Garnishes
For an extra layer of festive fun, sprinkle crushed Halloween-themed sprinkles or edible glitter around the serving platter. A few strategically placed candy pumpkins or mini marshmallows on the side can complement the mummies beautifully. These small touches elevate the presentation and get everyone excited before the first bite.
Side Dishes
Pair this creamy fudge with lighter accompaniments to balance the richness. A crisp apple cider, herbal teas with cinnamon, or even simple fruit slices such as green grapes or fresh berries contrast wonderfully. These sides also keep your spread vibrant and satisfying.
Creative Ways to Present
Presentation is part of the charm. Arrange your Halloween Mummy Fudge on black or orange serving trays for a pop of color. Wrapping individual pieces in clear cellophane tied with themed ribbons makes for delightful party favors or gifts. For a truly impressive setup, use tiered cake stands placed on a Halloween-decorated table with dim, flickering candles nearby to set the eerie mood.
Make Ahead and Storage
Storing Leftovers
Halloween Mummy Fudge loves the cold and should be stored in an airtight container in the fridge. Properly stored, it remains fresh and creamy for about one week. This makes it a perfect make-ahead treat for quick grab-and-go snacking, or to keep your Halloween celebrations running smoothly without last-minute prep.
Freezing
If you want to stretch your Halloween Mummy Fudge’s shelf life further, it freezes beautifully. Wrap each piece in plastic wrap and place them in a freezer-safe container or bag. Frozen fudge can last for up to two months, giving you flexibility for early preparation or surprise guests who drop by unexpectedly.
Reheating
To enjoy frozen or refrigerated fudge at its best, bring it to room temperature before serving. This usually takes about 15 to 20 minutes at room temperature. Avoid microwaving, as the candy melts and chocolate decorations may lose their texture and shape. Patience here means each piece remains as charming and delicious as the day it was made.
FAQs
Can I make Halloween Mummy Fudge dairy-free?
Absolutely! Substitute the white chocolate chips with dairy-free or vegan white chocolate alternatives and use coconut sweetened condensed milk instead of the regular kind. This way, you get all the creamy goodness without dairy.
What if I don’t have candy eyes?
No worries at all. You can use mini chocolate chips, carefully drawn chocolate dots with a toothpick, or even tiny pieces of black licorice. The fun is in the creativity, so feel free to improvise!
Can I use milk chocolate or dark chocolate instead?
This recipe specifically calls for white chocolate to achieve that iconic mummy bandage look, but if you prefer, you can experiment with milk or dark chocolate for the base. Just keep in mind it will change the visual impact of your mummies.
Why is my fudge grainy?
Grainy fudge usually results from overheating the chocolate or not stirring constantly. Low heat and constant stirring ensure the chocolate melts smoothly, creating that perfect fudge texture. Also, make sure all your ingredients are fresh.
How long does Halloween Mummy Fudge last outside the fridge?
Because this fudge contains dairy ingredients, it’s best kept in the fridge. Left at room temperature for more than a couple of hours, it can soften too much or spoil, especially in warm climates.
Final Thoughts
Halloween Mummy Fudge is such a delightful way to celebrate the spooky season with a treat that’s as fun to make as it is to eat. From the creamy, dreamy fudge base to the adorable mummy decorations, this recipe brings warmth and joy to any Halloween gathering. So go ahead, give it a try — your friends and family will thank you for adding this sweet twist to your festive traditions!
PrintHalloween Mummy Fudge Recipe

This Halloween Mummy Fudge is a delightfully spooky and sweet treat perfect for Halloween parties or festive gatherings. Made with creamy white chocolate and sweetened condensed milk, this fudge is decorated with candy eyes and white chocolate “bandages” to create adorable mummy faces. It’s easy to make, no-bake, and can be adapted for vegan and gluten-free diets using dairy-free and vegan-friendly alternatives.
- Prep Time: 10 minutes
- Cook Time: 10 minutes
- Total Time: 3 hours 20 minutes
- Yield: 16 pieces 1x
- Category: Dessert, Confectionery
- Method: No-Bake, Piping
- Cuisine: American
- Diet: Vegetarian
Ingredients
Fudge Ingredients
- 3 cups white chocolate chips (use dairy-free if needed)
- 1 (14 oz) can sweetened condensed milk (or coconut condensed milk for vegan)
- 1 teaspoon vanilla extract
- Pinch of salt
Mummy Decoration Ingredients
- 1 cup white candy melts (or more white chocolate, melted)
- Candy eyes (gluten-free/vegan-friendly)
Instructions
- Prepare the Pan: Line an 8×8-inch baking dish with parchment paper, ensuring the edges hang over the sides for easy removal of the fudge later.
- Combine Ingredients: In a saucepan over low heat, combine the white chocolate chips, sweetened condensed milk, and a pinch of salt. Stir constantly to prevent burning and ensure everything melts smoothly.
- Mix in Vanilla: Once the mixture is melted and smooth, remove the saucepan from heat and stir in the vanilla extract thoroughly for flavor.
- Chill the Fudge: Pour the fudge mixture into the prepared baking dish, smoothing the surface evenly. Place the dish in the refrigerator and chill for 2 to 3 hours until the fudge is firm enough to cut.
- Cut into Shapes: Remove the set fudge from the pan using the parchment paper edges and cut into squares or rectangles, approximately bite-sized pieces.
- Melt Candy for Decoration: Melt the white candy melts or extra white chocolate in a microwave-safe bowl or double boiler. Transfer the melted candy to a piping bag or a zip-top plastic bag with a small corner cut off for piping.
- Decorate the Mummies: Pipe zigzag lines across each fudge piece to mimic mummy bandages. While the candy is still soft, place two candy eyes onto each square to create the mummy faces.
- Set and Serve: Allow the decorations to set completely at room temperature or in the refrigerator until firm. Once set, the mummy fudge is ready to serve and enjoy.
Notes
- For a vegan version, use dairy-free white chocolate chips and coconut condensed milk.
- Ensure candy eyes are gluten-free and vegan if dietary restrictions apply.
- You can store the fudge in an airtight container in the refrigerator for up to one week.
- Try adding a few drops of orange or pink food coloring to the white candy melts for a different Halloween effect.
- If you don’t have a piping bag, a zip-top bag with a tiny corner snipped works well for decorating.
Nutrition
- Serving Size: 1 piece (approx. 35g)
- Calories: 160 kcal
- Sugar: 22 g
- Sodium: 45 mg
- Fat: 8 g
- Saturated Fat: 5 g
- Unsaturated Fat: 2 g
- Trans Fat: 0 g
- Carbohydrates: 22 g
- Fiber: 0.5 g
- Protein: 1.5 g
- Cholesterol: 10 mg
Keywords: Halloween fudge, mummy fudge, white chocolate fudge, Halloween dessert, no-bake fudge, spooky sweets